How To - Install Vapour Control And Vapour Barrier Membrane On Down Lights And Ceiling Hatches
Article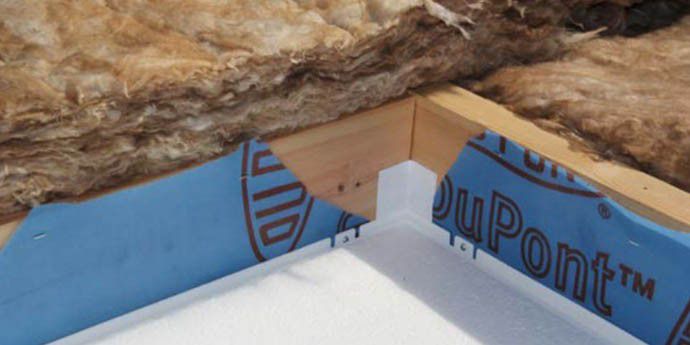
The following article covers some best practice experience sharing by the DuPont™ Tyvek® Technical team on how to ensure a successful installation. These guidelines have been developed through the team’s technical support at construction sites and direct feedback from contractors.
Before fitting the ceiling hatch, neatly trim the vapour control layer and vapour barrier membrane to the hatch opening, fold the flaps inward and carefully seal for airtightness – especially the corners. When the hatch is secured into place a butyl tape fixed between the hatch frame and AVCL will help to maintain airtightness where the fixing screws are driven through.
Light fittings often necessitate cutting holes in the vapour control and vapour barrier membrane for wiring, which would then need to be sealed for airtightness. Complicated sealing work can be avoided by creating a services void with battens which will accommodate the wiring and space the lining off the membrane.
Download our detailed installation guide

© 2021 DuPont de Nemours, Inc. All rights reserved. DuPont™, the DuPont Oval Logo, and all products, unless otherwise noted, denoted with ™, ℠ or ® are trademarks, service marks or registered trademarks of affiliates of DuPont de Nemours, Inc.